To start, you definitely don't need Photoshop (you can use Word, Paint, etc.) but for this tutorial I am going to show you how I make it with Photoshop. Click on the images below to see the text larger!
Step 1:
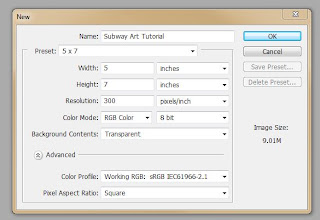
 Open up the Photoshop program, and click File > New. When the screen pops up, you can name your printable, then choose what size you want it to be. I do all different sizes of Subway Art, and depending on your printer (or availability of printing larger sizes) you can make virtually any size your mind desires! Make sure you set your resolution to 300 pixels/inch, then click OK.
Step 2:
I have OCD when it comes to straight lines and lining things up perfectly. If that's not you, you can skip ahead to Step 5. To start, you will want to make sure you can view rulers. To do so, click on View > Rulers (there should be a ✓ next to the Rulers line) {A quick keyboard shortcut, just press Ctrl+R}
Step 3:
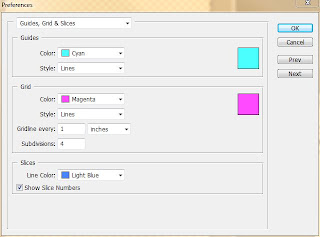
Now you will see the rulers along the top and left hand side of your screen. Next, you will want to view the grids. Click on Edit > Preferences > Guides, Grids, and Slices {A quick keyboard shortcut, just press Ctrl+K, then Ctrl+6}
Step 4:
 What works best for me is a gridline at every inch, with 4 subdivisions. Apply these settings to the screen.
You will then have a project that looks like this:
If it doesn't look like this, try adjusting your view settings to allow grids to appear. Click View > Show > Grid (there should be a ✓ next to the Grid line) {A quick keyboard shortcut, just press Ctrl+'}
Step 5:
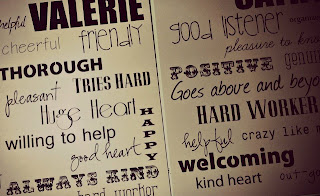
Now comes the fun part, adding your words! Use your creativity here. Any size, direction, font, etc. it's up to you! Here is the rough layout of my design
Now comes the fun part, adding your words! Use your creativity here. Any size, direction, font, etc. it's up to you! Here is the rough layout of my design
Step 6:
The last step I use is to adjust the kerning and spacing on certain fonts and sizes to make it look just right!
To do so, you have to show the character window. Click Window > Character (there should be a ✓ next to the Character line). Here is a final with some adjustments to font widths and heights and spacing!


No comments:
Post a Comment